Monday, 26 August 2013

Without the Rain…

Hello

Today I wanted to share a card that I hope will not jinx the nice weather we have been having.  I am off work now for over a week and I’m looking forward to being able to enjoy the sunshine.

I call it ‘Without the Rain…’


I chose to use my favourite colour combo of all time, aqua and lilac.  I don’t use it that often really and I don’t know why as these colours make me smile.  To me they are happy hues! J  In fact whilst putting the whole thing together I started singing ‘The Sun Will Come Out Tomorrow’ but after the dogs started howling I thought I’d better stop!

The image is of course Gorjuss and I coloured with Pro/Flexmarkers.  The papers are from my stash and I used Tattered Lace corners to provide a frame.  The gate is a Spellbinder Die D-Lite as is the cluster of flowers.


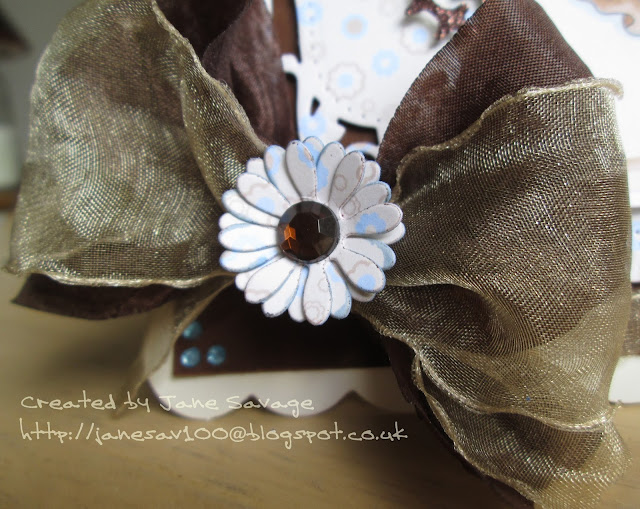
I am a bit bow mad so having found some matching satin ribbon I just had to use it.  It would have been rude not too. 

I needed an appropriate sentiment but couldn’t find one.  So I had to make one up and print it from my computer.  It is a phrase my mum often quotes at me when I moan about the weather. Don’t look too closely but I drew the cloud myself (must get a die for this type of thing I’m embarrassing myself with my D.I.Y. malarkey) and added some teardrop jewels for rain.

At least my cloud has a silver (& glittery) lining!


So there you go.  A happy card about rain.  Go figure!

See ya!

Smiling always (I’m off work for a week)!
Jane x

I would like to enter my card into the following challenges:


Sunday, 25 August 2013

An Angelic Christmas


Hello

It’s a bit dull and dreary here in good old Oxfordshire.  I took a trip into nearby Banbury yesterday to do a bit of clothes shopping (more window shopping really as I can’t afford to do anything else) and it’s scary to see that all the shops are now stocking their Autumn/Winter lines.  No sign of Christmas crackers yet though so that’s something!

So to today’s effort, I call it ‘An Angelic Christmas’.


I have to admit that I am not too keen on this card.  It did not turn out the 
way I had envisaged and no matter what I did I seemed to make it worse.  So why show it you say.  Well I think that it helps to look back on all your work regardless of how good or bad it is.  It’s like reading your old school reports, ‘could do better!’


So what did I do?  (Don’t worry I won’t include any of the expletives I used along the way to the end result!) The paper I used was printed from a Crafter’s Companion CD and I tore some paper to make a snowy ground.  All the stamps I used are from Kanban and I stamped three of the trees to create a scene.  I coloured with Pro/Flexmarkers and Graph’its.  I bought some Beads in a Bottle the other day (still have to master these) and they are the red and white ‘blobs’ that you can see.  To finish I highlighted with Stickles.


And there you go another Christmas card to add to my pile of 2!

See ya!

Smiling always (plus 1 makes 3, only 21 to go)!
Jane x

I would like to enter my card into the following challenges:


Tuesday, 20 August 2013

Santa’s Bag

Hello there.

Today I am showing a Christmas card, only my 2nd of the year so far.  I do not have very many to make at all now that I have moved jobs but I still leave it to the last minute and rush around like a headless Rudolph moaning that I don’t have enough time.  Still 2 down 22 to go!

So to card 2 and I call it Santa’s Bag.

A bag on a card.  Not particularly practical!


The design did not start out like this it just sort of evolved.  I had already stamped a few images from a collection of Christmas stamps I have from Joanna Sheen by Giordano and coloured them all using pencils.  Then what to do?  I chose my favourite which is called ‘Our Family’ (the adorable puppy did it for me, I’m dog mad!) and I particularly liked the way it turned out and decided it was an image destined for a bauble. 


 OK so I need a bauble die.  Excellent I have 2 sets but none of them fit.  Fudgy fingers!   So improvisation is called for so I cut Santa into a circle.  And that was as far as I got.  I stared and stared at my Santa in a circle for quite a while, mojo gone, I even completed another project in the meantime.  Then I was going through my embossing folders and came across a new one I hadn’t yet used from Couture Creations called ‘Message in a Tree’, which is in fact a message in a bauble (?). So I decided to emboss some of my gorgeous Centura pearl and stick my Santa over it.  You can just make out the hanger and ribbon at the top.  Yipee!  I have my bauble at last :-D.

Love that little dog but look at that teeny bird! Awwwww!


Having got this far my topper was now too big for a 6 x 6” so after embossing M-Bossabilities Dainty Dots onto an A5 piece of Centura Pearl (I should have shares in this stuff) I went mad with Tattered Lace corners and green cabochons.  I made a slightly wonky tag (don’t be too harsh it’s trying) tied it with twine and heat embossed my sentiment with Red Glitz WOW powder.

After adding Stickles all over the shop, a stamped holly sprig and red ribbon handles I was done. Phew!


So I am adding this card to the pile (well to the other one) and look forward to making more.  I love, love, love Christmas.

See ya!

Smiling always (well 2 Christmas cards by August is not bad (for me))!
Jane x

I would like to enter my card into the following challenges:


Monday, 19 August 2013

Watch the Birdie!

Hi

Wow, this is my second post of the day?  What’s the matter with me?

Well I wanted to share a card I made using some beautiful DP’s a bought just recently.  They are from First Edition and are called Dreamcatcher and are full of glazed and glittered purply goodness!  Yum!

I used ‘Wallflower’ from Saturated Canary as my focal image and coloured her with Pro/Flexmarkers and cut her out. 

Apologies for my rather rubbish photo tent!


She does appear to me to be looking at something so I thought I would give her that something in the shape of a shrink plastic bird.  This is a Kanban stamp that was the only one I could find that was facing the right direction!  I coloured the plastic with pencils and used a tin foil tray when heating.


Watch the birdie!


I used Spellbinders A2 Bracket Borders 1 and Labels 17 and of course had to finish with a big bow made from Satin Edge Organza, which is another of my ribbon favourites for its wonderful bowyness (not too sure that’s a word)!

Crystals, Fran-tage and a sentiment later and we’re all done!

See ya!

Smiling always (just had some gorgeous hot chicken from Sainsbury’s)!
Jane x

I would like to enter my card into the following fab challenges:


New Cutie Pie Challenge - Anything Goes!

Hello

Today launches a brand new challenge over at the Cutie Pies Challenge Blog and our theme is ‘Anything Goes’, so joining in is easy.  Our sponsor for this challenge is the amazing MilkCoffee who provide the most beautiful high quality cute and girly digital images that can be resized to suit any project!


There are so many styles to choose from so visit their store and check out their amazing artwork!

MilkCoffee are offering a very generous prize for one lucky winner.  5 digital images of their choice!  So come and play with us and join in the fun!

My Cutie teamies have created the most amazing projects to inspire you so hop over and check them out here.


So what MilkCoffee image did I choose?  Well I opted to use 'Glamorous Tiffany in her Night Dress' (which does rather suggest that she is ready for bed but no, she is red carpet bound!) Isn't she fab!


I coloured Tiffany with my Pro/Flexmarkers and I thought she might appreciate some ‘diamonds’ in her ears (well they are a girl’s best friend and her name is Tiffany).  I also added a touch of Stickles to her dress for added pizazz and then cut her out as I wanted a more 3D effect.


I have seen so many stunning cards using the larger of the Spellbinder dies to make the card  base and thought, “That looks good, I’ll give that a go!”.  So I did.

I began with Centura Pearl card (I love this stuff; such good quality and a gorgeous finish) and cut 2 of the Spellbinders Elegant Labels 4.  I scored about an inch from the top of one of them to create a hinge then stuck the two together.

I used Labels 4 to create my mats and sprinkled on some purple Fran-táge for a bit of sparkle.  Not too sure if I overdid it a bit though.  I was apparently wearing it on my nose, cheek and chin for most of the day!

I then cut several bits of matching card using the Sizzix Bigz 3D Flower die to make my roses and added an Anja Vintage Swirls die from Marianne Creatables behind them.


I do have quite a thing for Silky Crush ribbon which has very quickly become a bit of an obsession.  I have to stop myself using it on everything.  Even men’s cards!  It ties the most wonderful big bows and I have it in several colours (not enough though, I need more) so I had to add one to the corner for Tiffany with a rose to mark the centre.  Well, it would be rude not to!


And there you are; gems and a sentiment later and Tiffany shall go to the ball! (Bet she’s rather relieved about that!)


See ya!

Smiling always (now with a Fran-táge free face!)
Jane x

I would like to enter my card into the following challenges:


Tuesday, 13 August 2013

Oranges and Lemons (oh and apples too!)

Hi there

So another lovely Oxfordshire day!  I have to admit that I am rather relived that the cooler weather has arrived, even if won’t last (they say another hot spell is on the way.  Oh Joy!).  Actually being able to sleep throughout the night is a novelty so I’ll enjoy it while it lasts.

So, onto my effort for today. Once again I found I was inspired by the Graph’it Markers Blog Challenge which is Summer Sunshine (use orange and yellow). 

Orange and yellow! Oh my!  Not a colour combo I readily reach for but then these things are called ‘challenges’ for a reason.  Besides I should embrace my inner summer!

The image I chose to use is by Elisabeth Bell.  I love her artwork.  She creates such beautiful faces.  I wish I could draw like that.  In fact I wish I could draw full stop!  But there you go.

Sorry, it's a bit bright.  Sunglasses may be required!


I coloured  using Pro/Flexmarkers and some of my new Graphit markers I won a wee while ago.  I did add a little pencil to her hair and to the grass to add some depth too.  The papers are from my stash.


My dies are Spellbinders Floral Ovals, Tattered Lace ‘Happy Birthday’ and Ornate Corner which I cut 3 times in yellow, orange and green, just to add a little definition when matted together. I used Dried Marigold DI to give a ‘glow’ around the image.  Then I decided that I  wanted to add an apple tree (as you do) so I cut a green SB Whimsical Tree in dark green, then added hole punched lighter green circles that I coloured in the vein hope they looked like apples.  Not too sure they do.  There’s every possibility they look like small hole- punched pieces of green card someone scribbled on!  Ho, hum!


I finished off with glitter gems and there you go oranges, lemons and apples! A proper fruit salad!

See ya!

Smiling always (migraines gone, that’s why!)!
Jane x

I would like to be considered for the following challenges:


Saturday, 10 August 2013

A Cute CAS Chrsitmas

Hi

I am just recovering from my customary killer migraines that I have to endure every month.  They do vary (bless ‘em) and sometimes I’m not too bad and can actually function to some degree.  But I have to say that one of the best therapies’ that I have found for them, but does rather rely on the ability to focus, is colouring in.  Colouring in is one of those unsung heroes that should be offered on the NHS for all that ails you (well most that ails you).  I have really only recently taken it up and it has been a godsend to me and to many, many others I don’t doubt.  So story of woe over let’s get on with things shall we.   

I had an idea, inspired I must say by an old Christmas card I found in my drawer at work. I love the look of a black and white image that has had a splash of a single bright colour added to it.  So I thought I would give it a try.  How hard could it be? :-{

So here is only my second attempt at a CAS card.  I guess I have so much scrummy crafty stuff that the idea of not adorning my cards with it all (well not all at once) seems wrong somehow.  But I really admire the CAS look so I thought I would give it another try and design my take on it.

So here it is.  I call it (originally)… A Cute CAS Christmas.


I have used an old Kanban image and sentiment I found lurking in my stash.  I coloured with my Pro/Flexmarkers, adding touches of glitter to give a frosty feel.  I really like this image, particularly the little dog.  He reminds me of my friends Westie, Max.  Such a sweetheart!


I added a ribbon to the corner and then out came the shrink plastic.  Well if you can you should!  I stamped a small snowflake which shrank to a diddy snowflake which now looks more like a star. Oh well, it’s still cute.


So there it is my homage to all that is clean and simple.  Roll on the next CAS card I say (but not the migraine)!

See ya!

Smiling always (embracing the CAS!)!  
Jane xx

I would love to be considered in the following challenges:


Tuesday, 6 August 2013

Oh So Grateful – Hip, Hip, Hooray!

Hi there

I am positively bubbling with excitement.  I am doing a very happy dance as I speak (well type actually and it’s making it a little difficult) I have some unbelievable news.  I AM A CUTIE PIE.  Yes, I have been asked to join the Cutie Pie Challenge Blog Design Team!  Oh my word what an honour and a privilege not to mention a shock.  I have only had my blog since 3rd June this year so I am amazed and chuffed beyond words.  I want to thank the ladies for giving me this fab opportunity and I will endeavour not to let them down.

So, if I can keep my excitement levels to a minimum (not easy, keep making unattractive squealing noises), I will show my card for today.  And it is a big thank you to the Cutie Pie’s for giving me a chance.

I call it… well.. Thank You


I used a gorgeous scene from Elisabeth Bell and ventured into brand new territory for me.  I coloured the image with Sakura Design Pencils.  I have seen so many amazing inspirational pencil creations in Blogland so I just had to give it a go.  I was a little apprehensive about using this medium as I have not worked with pencils since I was young, in fact I still have a 36 piece collection of watercolour pencils given to me by my parents for my 12th birthday, and they are still going strong!  I think the image came out OK, but when you are used to the blending properties of alcohol markers it does seem a bit strange using something else.  That said I really enjoyed playing with them and shall be doing so again.

I love those cute toys.  I hope that dog's not trying to eat that butterfly!


My DP’s are from my ever faithful Brenda Pinnock 12 x 12” pad and I used Spellbinders Decorative Labels 8 and A2 Bracket Borders 1 to frame the design. I used my new B.F.F. Martha Stewart air dry clay and moulds to make my ebellies.  I love, love, love this stuff, so nice and easy to work with.


For my sentiment I used the fab Clearly Besotted Stamps Basic Banners set, which I won after entering the Passion for Promarkers challenge last week.  They stamp a dream.

Says it all really.

So there it is, a huge THANK YOU to the lovely Cutie ladies for allowing me on board.

See ya!

Smiling always (can’t stop, I’m a Cutie Pie! Yippee!)

Saturday, 3 August 2013

Silver Fairy

Hello

Hope all is well with you and yours.

Today I am sharing a card that gave me quite a few problems. You see I committed the cardinal sin; I coloured in my image before I chose my papers.  Naughty, naughty me!  And it serves me right too because I was faffing around for ages trying to find something I could use. 

So, I coloured the gorgeous Silver Fairy by Sylvia Zet with Pro & Flexmarkers and, after realising my mistake (and fishing frantically through my stash whilst using some words that would make even a builder blush) I found some old Kanban card that fitted the bill perfectly and some scrummy brown glitter card to match.  Phew! Saved!


I cut the Kanban card using Spellbinders Elegant Labels 4 and the glitter card using the Fleur De Lis Squares die which I cut in half before putting it behind my image.  I made a butterfly from the excellent Martha Stewart white clay using a mould and coloured it with markers and glitter.


I love, love, love big bows so just had to add one to my card using Silky Crush ribbon, adding a flower cut  from my Kanban card so it would match.

Big bow!


So there we go, glitter and gems to finish and all done.


See ya!

Smiling always (I’m a happy crafter!)
Jane x


Friday, 2 August 2013

A Wee Bee


Hello

So the schools are out and the roads are quiet: fantastic!  Not being blessed with children myself (just 3 hairy kids which are frankly enough for anyone) this is my only benefit during the school hols.  I hope the weather stays nice for all those parents who see the weeks ahead as a ‘bit of a challenge’.  I remember my mum always dreading bad weather in August as there were 4 of us, me and my three younger brothers (ooh ‘eck).  I’d like to say we were angels but that would be a big fat ugly lie.  Thankfully we all got on really well (and still do) but that made us conspirators which was probably way worse.  Poor Mum (Dad kept out of it).

Anyway here I am again with another offering to present to the world of Blog.  Today my image is ‘Wee Love You Bunches’ by Sylvia Zet.  Isn’t she just super cute, I love her?  I coloured her with Pro/Flexmarkers and added a touch of white gel pen for highlights.

I call it, ‘A Wee Bee’

What a cutie!


As she is looking at a little bee I thought I would recreate my own bee using shrink plastic. Why, I’m not too sure but please don’t look too closely at my slightly dodgy drawing skills.  I’m telling you it’s a bee, just in case you’re thinking, “What’s that!”


The paper I got free with a magazine and I used Oval, Scalloped Oval and Scalloped Borders 1 dies from Spellbinders.  I made the flowers myself (I always prefer to make my own flowers when I can, good or bad) . I used Heartfelt Creations Delicate Asters (supposed to look like sunflowers :-D) and Daisy Patch.  I put Flowersoft in the centres and all over my desk, myself, carpet and dog!

So ribbon, a doily, pearls and a sentiment later and Bob’s your uncle (or Wee’s your stamp) the card is done.

See ya!

Smiling always (lovin’ this challenge thing)
Jane x


I would like to enter my card into the following challenges: